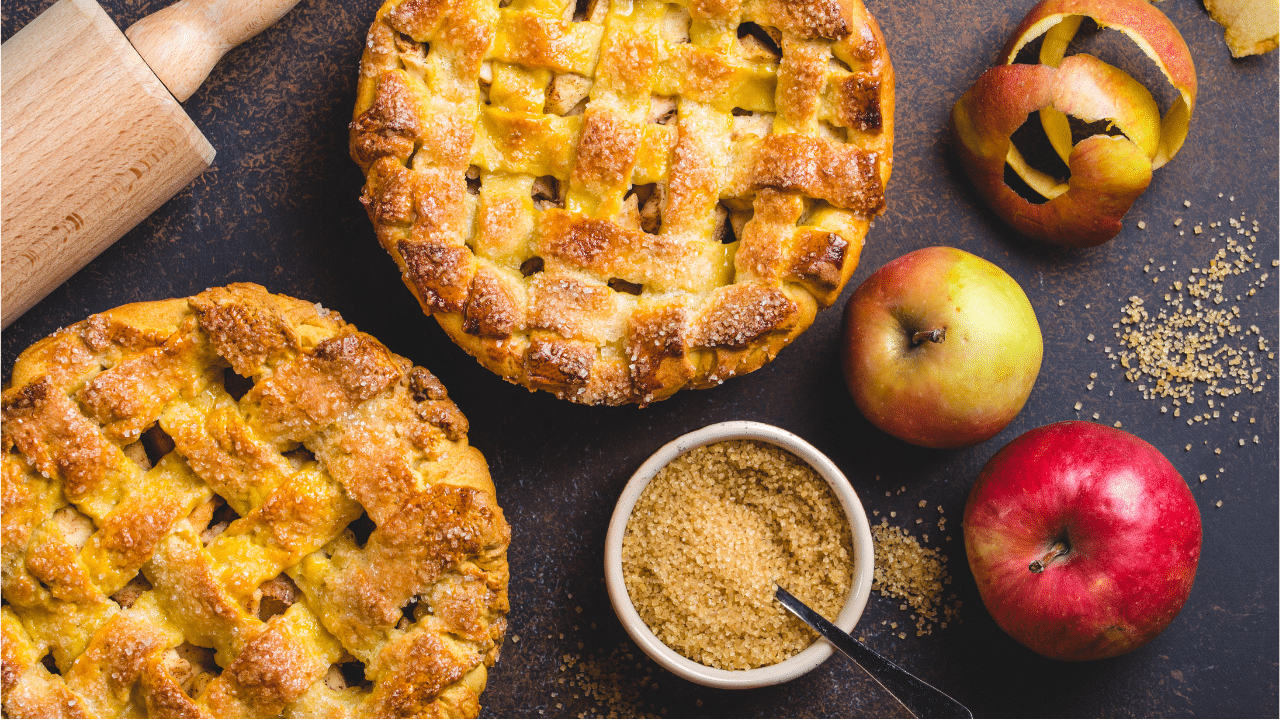
Picture this: It’s a crisp fall afternoon, and the aroma of cinnamon and baked apples fills your kitchen. You’ve just pulled a golden, flaky masterpiece out of the oven. Your family gathers around, eager for a slice. This isn’t just any dessert—it’s the best apple pie recipe you’ve ever tried.

With 5-star reviews calling it “THE best apple pie recipe EVER,” this crowd-pleasing favorite is worth every minute of its 5-hour prep and cook time. The secret? A perfectly balanced blend of spices, a crust that stays flaky, and a filling that never turns soggy. Plus, at 417 calories per serving and 6g of fiber, it’s a treat you can feel good about.
Ready to elevate your baking game? Stick around for pro tips like pre-cooking the filling and using tapioca starch for the perfect consistency. Trust us, this recipe will become your go-to for every occasion.
Key Takeaways
- This recipe is a crowd favorite with glowing 5-star reviews.
- Total prep and cook time is approximately 5 hours and 15 minutes.
- Features a flaky crust and perfectly balanced spices.
- Each serving contains 417 calories and 6g of fiber.
- Pro tips include pre-cooking the filling and using tapioca starch.
Why This Apple Pie Recipe is a Must-Try
Imagine a dessert that brings everyone to the table. This isn’t just any treat—it’s a crowd-pleaser with 97% 5-star reviews. Whether you’re using a store-bought or homemade crust, this recipe delivers every time.
One reader, Sami, said,
“My family absolutely loved it!”
Another, Sofia, called it
“the best I’ve ever had.”
Compared to other desserts like pecan or pumpkin pie, this one stands out for its perfect balance of flavors and textures.
What makes it so special? A quick 5-minute pre-cook step enhances the filling’s flavor, and the golden, bubbling crust is a visual treat. Plus, it’s versatile—perfect for holidays or a cozy weekend dessert.
- Save time with make-ahead dough.
- Works with any crust, homemade or store-bought.
- Visual cues like a golden crust and bubbling juices ensure it’s done perfectly.
This recipe isn’t just about taste—it’s about creating memories. Try it once, and it’ll become your go-to for every occasion.
Choosing the Best Apples for Your Pie
The secret to a great dessert starts with the right ingredients. When it comes to baking, selecting the best apples is key. The right variety ensures a perfect balance of flavor and texture.
Granny Smith: The Top Choice
Granny Smith apples are a baker’s favorite. Their firm texture holds up well during baking, preventing mushiness. The tartness of Granny Smith adds a refreshing contrast to the sweetness of the filling.
Thanks to their high pectin content, these apples maintain their structure. This makes them ideal for creating a dessert that’s both flavorful and visually appealing.
Other Great Apple Varieties
If Granny Smith isn’t your preference, there are other excellent options. Jazz apples offer a sweet-tart balance, while Pink Lady provides a crisp bite. Jonagold is another great choice, blending sweetness with a hint of tartness.
For the best results, mix tart and sweet varieties. Combining four tart apples with four sweet ones creates a depth of flavor that’s hard to beat.
| Apple Variety | Flavor Profile | Best Use |
|---|---|---|
| Granny Smith | Tart | Baking, Filling |
| Jazz | Sweet-Tart | Baking, Snacking |
| Pink Lady | Sweet | Baking, Salads |
| Jonagold | Sweet-Tart | Baking, Sauces |
Avoid softer varieties like McIntosh, as they tend to break down during baking. For the best texture, always peel your apples before using them in your recipe.
Essential Equipment for Making Apple Pie
Having the right tools can make or break your baking experience. Start with a 9″ deep-dish glass pie plate. Its transparency lets you monitor the crust’s browning, and its size ensures your filling fits perfectly.
For a golden, even crust, use an aluminum foil shield. Fold a 38″ strip twice to create a sturdy barrier. This prevents over-browning while your dessert bakes in the oven.
- A sturdy rolling pin for evenly flattening dough.
- Pie weights to keep the crust from puffing up during blind baking.
- A pastry brush for applying egg wash or butter.
Pair your pie plate with a heavy-duty baking sheet. It provides stability and catches any drips. For precision, an instant-read thermometer ensures your filling reaches the perfect temperature.
Optional tools like an apple peeler save time, while a coarse sugar sprinkler adds a finishing touch. With these essentials, you’re ready to create a dessert that’s as beautiful as it is delicious.
How to Prepare the Perfect Pie Crust
Crafting the perfect crust is the foundation of any great dessert. Whether you’re a beginner or a seasoned baker, mastering the art of crust-making is easier than you think. The right techniques and ingredients can make all the difference.
All-Butter vs. Sourdough Crust
Choosing the right type of dough is crucial. An all-butter crust offers rich flavor and a tender texture. The butter creates layers that result in a flaky pie crust. On the other hand, a sourdough crust adds a tangy twist and a unique depth of flavor.
For a balanced option, try combining butter with a small amount of shortening. This prevents sogginess and ensures a crisp finish. Both types work well, so pick the one that suits your taste.
Tips for a Flaky Crust
Creating a flaky pie crust starts with cold ingredients. Chill your butter and water before mixing. A cold work surface also helps maintain the dough’s temperature.
Roll the dough into a 12″ circle for even baking. Use pie weights during blind baking to prevent shrinkage. After rolling, chill the dough for at least 30 minutes to set its shape.
For a golden finish, apply an egg wash. Mix one egg with a tablespoon of milk and brush it over the crust before baking. This simple step adds a professional touch to your dessert.
- Use cold ingredients and a chilled surface for best results.
- Roll dough evenly to a 12″ circle for consistent baking.
- Chill dough for 30 minutes to prevent shrinkage.
- Apply an egg wash for a golden, glossy finish.
Creating the Apple Pie Filling
The heart of any great dessert lies in its filling. A well-crafted apple filling combines the right balance of sweetness, spice, and texture. Start by selecting the best fruit and preparing it properly to ensure a delicious result.
Spices and Sweeteners
Spices and sweeteners are essential for enhancing the flavor of your filling. Use 1.5 teaspoons of cinnamon for warmth and depth. Add a pinch of nutmeg or allspice for a subtle complexity. These spices pair perfectly with the natural sweetness of the fruit.
When it comes to sugar, brown sugar is a great choice. It adds a rich, caramel-like flavor. White sugar works too, but it’s lighter and less complex. Mix the spices and sugar in a bowl before adding them to the slices.
How to Slice Apples for Pie
Proper slicing ensures your filling has the right texture. Cut the fruit into ½” slices or wedges. This size prevents mushiness during baking. A uniform cut also helps the slices cook evenly.
To keep the slices from browning, toss them in lemon juice. This step is quick but makes a big difference. After slicing, place the pieces in a large bowl and mix them with the sugar and spice blend.
Let the mixture macerate for at least three hours. This process draws out excess liquid and reduces the volume by about 33%. Before baking, discard the juices in the bowl to avoid a soggy filling.
- Use 1.5 tsp cinnamon and a pinch of nutmeg or allspice for flavor.
- Cut the fruit into ½” slices to maintain texture.
- Toss slices in lemon juice to prevent browning.
- Macerate for 3+ hours to reduce liquid.
- Discard bowl juices before baking to avoid sogginess.
Assembling and Baking Your Apple Pie
The final steps of baking are where the magic truly happens. Assembling and baking your dessert requires attention to detail to ensure a golden, flaky result. Follow these tips to create a masterpiece that’s as beautiful as it is delicious.
Layering the Crust and Filling
Start by rolling out your dough into a 12″ circle. Place it gently into your pie plate, ensuring it fits snugly. Add your prepared filling, spreading it evenly for consistent baking.
For the top crust, you have two options: a solid crust or a lattice design. A solid crust is classic and easy, while a lattice adds a decorative touch. If using a solid crust, cut six 3″ slits to allow steam to escape during baking.
Baking Tips for a Golden Crust
Preheat your oven to 400°F to bake the crust perfectly. Place the assembled dessert in the oven and bake for 25 minutes. After this, reduce the temperature to 375°F to finish baking.
Use foil to shield the edges during the first 25 minutes. This prevents over-browning while the rest of the crust bakes evenly. Rotate the pie halfway through for uniform browning.
Look for signs of doneness: bubbling filling, a golden top crust, and a rich aroma. For precision, check the internal temperature with a thermometer—it should read 195°F.
- Choose between a solid or lattice top crust for your dessert.
- Cut slits in the top crust for venting.
- Reduce oven temperature from 400°F to 375°F after 25 minutes.
- Shield edges with foil during the first 25 minutes of baking.
- Look for bubbling filling and a golden crust to know it’s done.
How to Know When Your Apple Pie is Done
Knowing when your dessert is perfectly baked can be a game-changer. Timing and temperature are key to achieving the ideal bake. On average, it takes about 75 minutes in the oven, but there are other ways to check for doneness.
Start by looking at the crust. A golden-brown color is a clear sign it’s ready. If the edges are caramelized and the top is bubbling with juices, your creation is likely done. These visual cues are reliable indicators of a well-baked treat.
For a more precise method, use an instant-read thermometer. Insert it into the center of the filling—it should read between 195°F and 200°F. This ensures the filling is cooked through without overbaking the crust.
Underbaking can lead to a soggy crust, so it’s better to err on the side of caution. Keep in mind that carryover cooking occurs as the dessert cools. This means it will continue to bake slightly even after being removed from the oven.
| Method | Pros | Cons |
|---|---|---|
| Visual Check | Quick and easy | Subjective, less precise |
| Thermometer | Accurate and reliable | Requires additional tool |
If the edges are browning too quickly, shield them with foil. This prevents over-browning while the rest of the dessert finishes baking. Rotate the dish halfway through for even cooking.
By combining visual checks with a thermometer, you’ll achieve the perfect bake every time. Mastering these techniques ensures your dessert is as delicious as it looks.
Serving and Storing Your Apple Pie
After baking, the real fun begins—serving and storing your creation. Whether you’re enjoying it fresh or saving it for later, these tips ensure your dessert stays delicious and presentable.
Topping Ideas
Elevate your dessert with creative toppings. A scoop of vanilla ice cream or a drizzle of caramel sauce adds a decadent touch. For a simpler option, dust the top with powdered sugar or sprinkle coarse sugar for a sweet crunch.
- Serve à la mode with a scoop of ice cream.
- Drizzle caramel or chocolate sauce for extra flavor.
- Add a sprinkle of powdered sugar for a classic finish.
Freezing and Reheating Tips
If you’re not serving your dessert right away, proper storage is key. Let it cool at room temperature for at least three hours before covering. This prevents condensation, which can make the crust soggy.
For longer storage, freeze your unbaked creation for up to two months. Wrap it tightly in plastic wrap and foil to prevent freezer burn. When ready to bake, place it directly in the oven from frozen, adding an extra 15-20 minutes to the baking time.
- Store at room temperature for up to two days.
- Refrigerate for up to five days for longer freshness.
- Reheat slices at 375°F for 35 minutes to restore crispness.
Conclusion
There’s nothing quite like the joy of sharing a homemade treat with loved ones. This classic dessert, with its perfect blend of spices and flaky crust, has earned over 3,000 5-star reviews. It’s a family-approved favorite that’s been passed down for generations.
What makes this recipe stand out? The unique spice blend and foolproof crust technique ensure a golden, delicious result every time. Try adding cranberries for a seasonal twist or share the recipe with friends to spread the love.
For a step-by-step guide, check out our video tutorial. Now, it’s your turn to create something special. Preheat your oven and let the baking begin!
FAQ
What makes this apple pie recipe stand out?
This recipe combines a flaky, buttery crust with a perfectly spiced filling. It’s easy to follow and guarantees a delicious result every time.
Which apples are best for baking?
Granny Smith apples are the top choice because they’re tart and hold their shape well. You can also try Honeycrisp or Braeburn for a sweeter flavor.
Do I need special equipment to make a pie?
A rolling pin, pie plate, and a sharp knife are essential. A pastry cutter or food processor can also help with the dough.
How do I achieve a flaky crust?
Keep your ingredients cold, handle the dough gently, and don’t overwork it. Using all-butter dough also helps create that perfect flaky texture.
What spices work best in the filling?
Cinnamon is a classic, but nutmeg and a pinch of cloves add depth. Brown sugar enhances the sweetness and caramelizes beautifully.
How thick should I slice the apples?
Aim for thin, even slices—about ¼ inch thick. This ensures they cook evenly and create a cohesive filling.
How do I prevent the crust from burning?
Cover the edges with foil during the first half of baking. Remove it later to let the crust turn golden brown.
How can I tell when the pie is done?
The filling should bubble slightly, and the crust should be golden. Insert a knife into the center—it should slide through the apples easily.
What are some great toppings for apple pie?
Vanilla ice cream, whipped cream, or a drizzle of caramel sauce are all fantastic options. They add extra flavor and texture.
Can I freeze the pie for later?
Yes! Wrap it tightly in plastic and foil before freezing. Reheat in the oven for the best results.


