The Ultimate Guide to Baby Food: Nutrition, Stages, and Homemade Recipes
The Importance of Proper Nutrition in Infancy
Proper nutrition during infancy supports healthy development and growth
The first year of life is a period of rapid growth and development. Your baby’s brain will double in size, and their body weight will typically triple by their first birthday. Providing proper nutrition during this critical window supports optimal development of the brain, immune system, and overall physical growth.
According to the American Academy of Pediatrics, breast milk or formula should remain the primary source of nutrition for the first 6 months. As you introduce solid foods, they complement—rather than replace—milk feedings, gradually becoming a larger part of your baby’s diet as they approach their first birthday.
Key Nutritional Needs for Babies:
- Iron: Critical for brain development and oxygen transport
- Zinc: Supports immune function and growth
- Healthy fats: Essential for brain development
- Protein: Builds and repairs tissues
- Vitamins A, C, D: Support vision, immune function, and bone health
Starting solids isn’t just about nutrition—it’s also about developing oral motor skills, experiencing new tastes and textures, and establishing healthy eating patterns that can last a lifetime. Research shows that early exposure to a variety of healthy foods can help shape food preferences later in life.
Baby Food Stages: A Complete Breakdown
Baby food is typically categorized into stages based on age, texture, and complexity. Understanding these stages helps you introduce foods in a developmentally appropriate way as your baby grows.
Stage 1: First Foods (4-6 Months)
When your baby shows signs of readiness—sitting with support, showing interest in food, and losing the tongue-thrust reflex—it’s time to introduce first foods. The American Academy of Pediatrics recommends starting solids around 6 months, though some pediatricians may suggest beginning between 4-6 months based on individual development.
Stage 1 Characteristics:
- Thin, smooth purees with a single ingredient
- Runny consistency similar to breast milk or formula
- Simple foods like single fruits, vegetables, or infant cereals
- No added salt, sugar, or spices
- Introduce one new food every 3-5 days to watch for allergic reactions
Recommended First Foods:
- Iron-fortified infant cereal (mixed with breast milk or formula)
- Sweet potato
- Avocado
- Banana
- Apple
- Pear
- Carrots
Stage 2: Textured Foods (6-8 Months)
As your baby becomes accustomed to basic purees, you can begin introducing slightly thicker textures and combinations of foods. This stage helps develop your baby’s oral motor skills and expands their palate.
Stage 2 Characteristics:
- Thicker consistency with small, soft lumps
- Combinations of 2-3 ingredients
- Introduction of protein sources like chicken, turkey, or legumes
- Mild herbs and spices can be introduced (no salt or sugar)
- Slightly larger portions as baby’s appetite increases
Food Combinations to Try:
- Apple and blueberry
- Sweet potato and carrot
- Banana and avocado
- Pear and spinach
- Chicken with apple and sweet potato
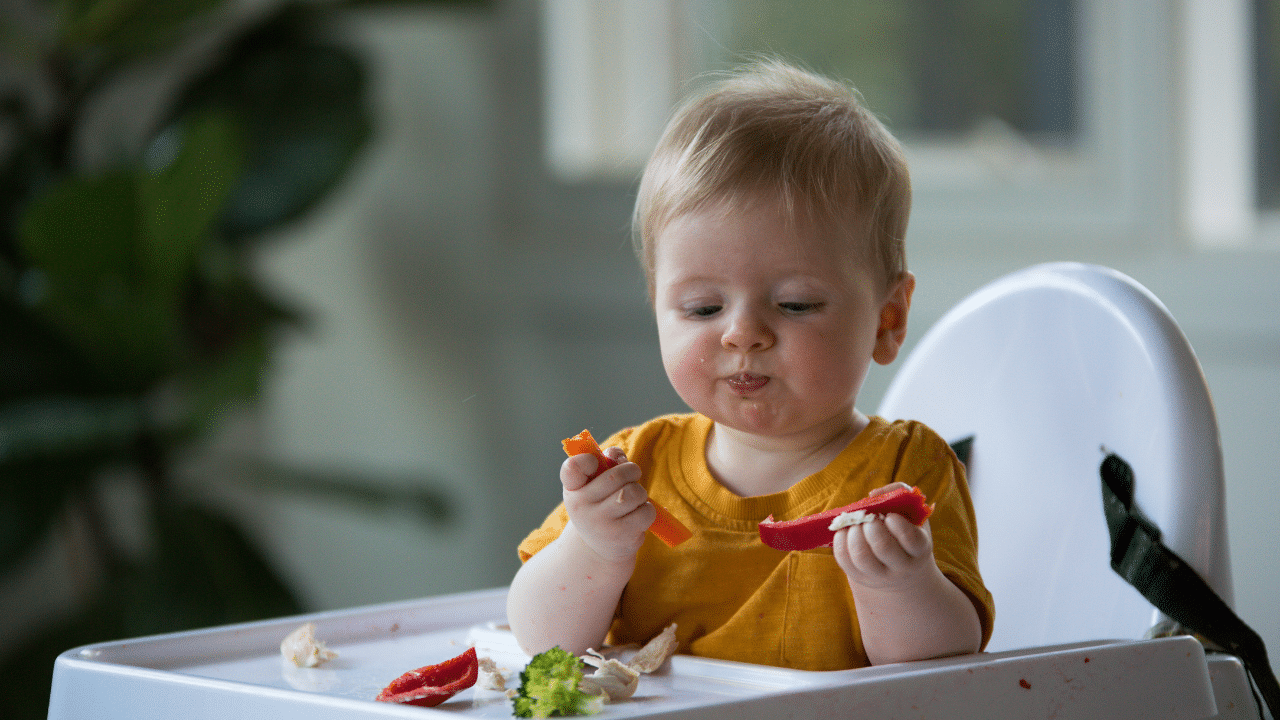
Stage 3: Chunky Foods (8-12 Months)
By 8-10 months, most babies are ready for more texture and variety. This stage bridges the gap between purees and table foods, helping your baby develop chewing skills even if they don’t have many teeth yet.
Stage 3 Characteristics:
- Chunky textures with soft, small pieces
- Multiple ingredients in each meal
- Introduction of finger foods that dissolve easily
- More complex flavor combinations
- Gradual transition to modified table foods
Foods to Explore:
- Soft, diced fruits and vegetables
- Well-cooked pasta pieces
- Shredded or small pieces of tender meats
- Soft-cooked beans and lentils
- Small pieces of soft cheese
- Whole grain bread cut into small pieces
Nutritional Requirements for Each Development Phase
As your baby grows, their nutritional needs evolve. Understanding these changing requirements helps you provide the right balance of nutrients at each stage of development.
| Age Range | Key Nutrients | Daily Needs | Food Sources |
| 4-6 months | Iron, Zinc | 0.27-11mg iron, 2-3mg zinc | Iron-fortified cereals, pureed meats, breast milk/formula |
| 6-8 months | Iron, Zinc, Protein, Vitamin A | 11mg iron, 3mg zinc, 11g protein | Meats, beans, egg yolk, orange vegetables |
| 8-12 months | Iron, Calcium, Healthy Fats, B Vitamins | 11mg iron, 270mg calcium, 30g fat | Dairy, meats, whole grains, variety of fruits/vegetables |
Important: Breast milk or formula continues to provide significant nutrition throughout the first year. Solid foods complement these milk feedings but don’t replace them entirely until after 12 months of age.
Special Nutritional Considerations
Iron
Iron stores from birth begin depleting around 4-6 months, making iron-rich foods essential. Iron is crucial for brain development and preventing anemia. Good sources include iron-fortified infant cereals, pureed meats, and legumes.
Healthy Fats
Babies need fat for brain development and energy. About 40-50% of calories should come from fat in the first year. Sources include avocado, olive oil, full-fat yogurt, and breast milk/formula.
Stay Updated on Baby Nutrition
Receive weekly tips, new recipes, and expert advice on infant nutrition directly to your inbox.
Store-Bought vs. Homemade Baby Food: Making the Right Choice
Both store-bought and homemade baby foods have their place in your feeding journey. Understanding the pros and cons of each option helps you make informed choices that work for your family’s lifestyle and preferences.
Store-Bought Baby Food Benefits
- Convenience and time-saving
- Consistent texture and portion sizes
- Longer shelf life
- Commercial testing for contaminants
- Nutritional consistency
- Variety of flavors and combinations
- Portable for on-the-go feeding
Store-Bought Baby Food Limitations
- Generally more expensive per serving
- May contain preservatives or additives
- Limited control over ingredients
- Often less flavorful than homemade
- Texture may not prepare baby for table foods as effectively
- Environmental impact of packaging
- May contain added sugars or salt in some brands
Homemade Baby Food Benefits
- Complete control over ingredients and quality
- Cost-effective, especially for organic options
- Can match family meals for easier transition
- Customizable textures as baby develops
- No additives or preservatives
- Introduces baby to authentic food flavors
- Can create combinations not available commercially
Homemade Baby Food Challenges
- Time-consuming to prepare
- Shorter shelf life
- Requires planning and food storage solutions
- Need for proper food safety knowledge
- Less convenient for travel
- May require special equipment
- Consistency can vary between batches
Finding the Right Balance
Many parents find that a combination approach works best. You might make homemade food when you have time and use commercial options when convenience is needed. The quality of baby food matters more than whether it comes from a jar or your kitchen.
“The goal is to provide nutritious foods that support your baby’s development while creating a positive relationship with eating. How you achieve that goal can be flexible and adapt to your family’s needs.”
Step-by-Step Guide to Introducing Solids
Introducing solid foods is a gradual process that should be approached with patience. This step-by-step guide will help you navigate this exciting milestone with confidence.
-
Watch for Readiness Signs
Look for these indicators that your baby is ready for solids:
- Sits up with minimal support
- Shows interest in what you’re eating
- Has lost the tongue-thrust reflex (no longer automatically pushes food out)
- Can move food from the front to the back of the mouth
- Seems hungry after full milk feedings
-
Choose the Right Time
Offer first foods when your baby is:
- Well-rested and in a good mood
- Somewhat hungry but not starving
- Healthy (not fighting a cold or illness)
- Alert and interested
-
Start with a Single Ingredient
Begin with one simple food and wait 3-5 days before introducing another to watch for any allergic reactions. Signs of food allergies include:
- Rash or hives
- Vomiting or diarrhea
- Unusual fussiness
- Respiratory symptoms
-
Begin with Small Amounts
Start with 1-2 teaspoons and gradually increase as your baby shows interest. The first few feedings are more about the experience than nutrition.
-
Follow Your Baby’s Cues
Watch for signs that your baby is full or uninterested:
- Turning head away
- Closing mouth
- Pushing food away
- Showing decreased interest
Never force your baby to eat more than they want.
-
Gradually Increase Variety and Texture
As your baby becomes comfortable with basic purees, gradually introduce:
- More complex flavor combinations
- Thicker textures
- Small, soft lumps
- Different food groups
-
Introduce Potential Allergens Thoughtfully
Current research suggests introducing common allergens (like peanut butter, egg, dairy) earlier rather than later may help prevent allergies. Consult your pediatrician about introducing:
- Peanut products (thinned peanut butter)
- Egg (well-cooked)
- Dairy (yogurt)
- Wheat
- Soy
Important Safety Note: Always stay with your baby during feeding times. Never prop a bottle or leave a baby alone with food due to choking hazards.
5 Easy Homemade Baby Food Recipes
Creating homemade baby food doesn’t have to be complicated. These simple recipes are perfect for beginners and can be adapted as your baby grows. Each recipe makes approximately 1-2 cups of baby food, which can be frozen in ice cube trays for convenient portions.
Stage 1 Recipes (4-6 months)
Simple Sweet Potato Puree
Ingredients:
- 1 medium sweet potato
- Water, breast milk, or formula for thinning (if needed)
Instructions:
- Preheat oven to 400°F (200°C)
- Wash, peel, and cut sweet potato into 1-inch cubes
- Bake for 20-25 minutes until tender, or steam for 15 minutes
- Puree in a blender or food processor until smooth
- Add liquid as needed to achieve desired consistency
Nutrition: Rich in vitamin A, fiber, and potassium. Perfect first food for babies.
Creamy Avocado Puree
Ingredients:
- 1 ripe avocado
- 1-2 teaspoons breast milk or formula (optional)
Instructions:
- Cut avocado in half and remove pit
- Scoop flesh into a bowl
- Mash with a fork until smooth
- Add liquid if needed for a thinner consistency
- Serve immediately or store with lemon juice to prevent browning
Nutrition: Excellent source of healthy fats for brain development, vitamin E, and fiber.
Stage 2 Recipes (6-8 months)
Apple and Blueberry Blend
Ingredients:
- 1 apple, peeled and cored
- 1/2 cup blueberries (fresh or frozen)
- Water for steaming
Instructions:
- Cut apple into small pieces
- Steam apple pieces for about 8 minutes until soft
- Add blueberries and steam for another 2-3 minutes
- Transfer to blender and puree to desired consistency
- For older babies, leave some texture
Nutrition: Rich in antioxidants, vitamin C, and fiber. The blueberries add important phytonutrients for brain development.
Stage 3 Recipes (8-12 months)
Vegetable and Lentil Mash
Ingredients:
- 1/4 cup red lentils, rinsed
- 1 small carrot, peeled and diced
- 1/4 cup sweet potato, peeled and diced
- 1/4 teaspoon mild curry powder (optional)
- 1 cup water or low-sodium vegetable broth
Instructions:
- Combine all ingredients in a small pot
- Bring to a boil, then reduce heat and simmer for 20 minutes until vegetables and lentils are soft
- Mash with a fork for a chunky texture or blend briefly for a smoother consistency
- Allow to cool before serving
Nutrition: Excellent source of plant-based protein, iron, and fiber. The mild spice helps develop your baby’s palate.
Banana Oatmeal Fingers (Finger Food)
Ingredients:
- 1 ripe banana, mashed
- 1/2 cup rolled oats (ground in blender for younger babies)
- 1 egg, beaten
- 1/4 teaspoon cinnamon (optional)
Instructions:
- Preheat oven to 350°F (175°C)
- Mix all ingredients in a bowl until well combined
- Drop spoonfuls onto a lined baking sheet and flatten slightly into finger shapes
- Bake for 15 minutes until firm
- Cool completely before serving
Nutrition: Great source of energy from complex carbohydrates, fiber, and potassium. Perfect for developing pincer grasp.
Get Our Complete Baby Food Recipe Collection
Download our free printable guide with 20 nutritious baby food recipes, storage tips, and a meal planning calendar.
Baby Food Safety Tips: What Every Parent Should Know
Ensuring your baby’s food is safe is just as important as making it nutritious. These essential safety guidelines will help protect your little one as they explore new foods.
Preventing Choking Hazards
Always supervise your baby during meals. Even appropriate foods can pose choking risks if not prepared correctly or if your baby isn’t supervised.
Foods to Avoid Until Age 4:
- Whole grapes (cut into quarters)
- Hot dogs (cut lengthwise, then into small pieces)
- Hard raw vegetables
- Whole nuts and seeds
- Popcorn
- Hard or sticky candy
- Chunks of nut butter
Safe Food Preparation:
- Cook foods until soft enough to mash with a fork
- Cut round foods into quarters
- Remove all pits, seeds, and tough skins
- Shred or finely chop meats
- Test food texture before offering
- Ensure proper seating position during meals
Safe Storage Guidelines
| Storage Location | Maximum Storage Time | Storage Tips |
| Refrigerator | 48 hours | Store in airtight containers; label with date and contents |
| Freezer | 1-3 months | Use ice cube trays for portion control; transfer to freezer bags once frozen |
| Room Temperature | 1-2 hours maximum | Discard any food left out longer than 2 hours |
Introducing Potential Allergens
Current pediatric guidelines recommend introducing common allergenic foods early (between 4-11 months) to help prevent food allergies, unless your baby has severe eczema or known food allergies.
Tips for Introducing Allergenic Foods:
- Introduce one allergenic food at a time
- Offer in the morning so you can monitor reactions throughout the day
- Start with a small amount (1/4 teaspoon) and gradually increase
- Wait 3-5 days before introducing another allergenic food
- Continue offering regularly if no reaction occurs
Common Food Allergens to Introduce Carefully:
- Peanuts (thinned peanut butter or peanut powder mixed into puree)
- Egg (well-cooked yolk first, then whole egg)
- Dairy (yogurt or cheese before milk)
- Wheat
- Soy
- Tree nuts (as smooth nut butters, thinned)
- Fish and shellfish
Signs of an allergic reaction include: Hives, swelling of face/lips, vomiting, diarrhea, difficulty breathing, or lethargy. If you notice any of these symptoms, especially breathing difficulties, seek medical attention immediately.
Frequently Asked Questions About Baby Food
When is my baby ready to start solid foods?
Most babies are ready for solids between 4-6 months, with the American Academy of Pediatrics recommending around 6 months as the ideal time. Look for these readiness signs:
- Sits up with minimal support
- Has good head control
- Shows interest in food
- Opens mouth when food approaches
- Has lost the tongue-thrust reflex
- Seems hungry after full milk feedings
Remember that every baby develops at their own pace. Consult with your pediatrician if you’re unsure about your baby’s readiness.
Should I start with fruits or vegetables first?
There’s no strict rule about whether to start with fruits or vegetables. Some pediatricians recommend vegetables first, particularly less sweet options like sweet potatoes or carrots, to help develop a taste for vegetables before introducing naturally sweet fruits.
However, there’s no scientific evidence that starting with fruits makes babies reject vegetables later. The most important factor is offering a variety of healthy foods and repeated exposure to different flavors.
Iron-rich foods like iron-fortified cereals or pureed meats are particularly important early foods because babies’ natural iron stores begin to deplete around 6 months.
How much food should my baby eat at each stage?
4-6 months: Start with 1-2 teaspoons once a day, gradually increasing to 1-2 tablespoons. Breast milk or formula remains the primary source of nutrition.
6-8 months: Work up to 2-3 tablespoons per meal, 2-3 times a day. Continue regular milk feedings.
8-12 months: Offer 3-4 tablespoons per meal, 3 times a day, plus 1-2 snacks. Milk feedings continue but may decrease slightly as solid intake increases.
Always follow your baby’s hunger and fullness cues. Some days they may eat more, other days less. This is normal and part of developing healthy eating patterns.
What equipment do I need to make baby food at home?
You don’t need specialized equipment to make baby food, though some tools can make the process easier:
- Essential items: Pot for steaming/boiling, fork for mashing, blender or food processor, ice cube trays for freezing, storage containers
- Helpful but optional: Baby food maker (combines steaming and blending), immersion blender, food mill, silicone freezer trays with lids
Many foods like bananas and avocados can simply be mashed with a fork. As your baby progresses to more textured foods, you’ll need less processing equipment.
What’s the difference between baby-led weaning and traditional spoon-feeding?
Traditional spoon-feeding involves offering pureed foods on a spoon, gradually increasing texture as your baby develops. This method gives you more control over what and how much your baby eats.
Baby-led weaning (BLW) skips purees and allows babies to self-feed appropriate finger foods from the start. Babies control what and how much they eat, potentially developing better self-regulation and motor skills.
Many families use a combined approach, offering both purees and appropriate finger foods. The best method is the one that works for your family and keeps your baby safe and well-nourished.
If choosing BLW, ensure foods are soft enough to mash between your fingers and cut into appropriate sizes to prevent choking.
Embarking on Your Baby’s Food Journey
Starting your baby on solid foods is a journey filled with discovery, mess, and joy. Remember that each baby is unique in their preferences and pace. What works for one may not work for another, and that’s perfectly normal.
The most important aspects of introducing solids are ensuring safety, offering nutritious options, and creating positive feeding experiences. These early interactions with food help shape your child’s relationship with eating for years to come.
Be patient with the process and with yourself. There will be days of enthusiastic eating and days of rejection. This is all part of your baby’s exploration of the wonderful world of food.
“The goal isn’t perfect nutrition at every meal, but rather introducing your child to a variety of healthy foods and creating a foundation for lifelong healthy eating habits.”
Trust your instincts, follow your baby’s cues, and enjoy this special time of discovery together. Before you know it, your little one will be joining the family at the dinner table, building on the healthy foundation you’ve helped create.
Start Your Baby’s Nutrition Journey With Confidence
Get our complete baby food guide with printable recipes, meal planners, and detailed nutrition information for each stage of development.